
For those who have the almost outrageous good fortune to be in possession of an older Vespa that needs restoration, here is a how-to guide.
No matter whether the scooter was found somewhere (barn, garage, basement), or was purchased used: The ravages of time have properly gnawed at the two-wheeler. The task now is to restore it to its original condition as far as possible. The first question to ask is: What does the fun cost in terms of time and money?
Costs narrowed down and estimated
DIY builders also have to buy the material in any case, but we DIYers save ourselves the considerable costs for labor wages. Nevertheless, depending on the cost of the material and the new parts required, 1500 € to 2500 € have to be paid (upper limit open). For the most cost-efficient purchase with the best advice, it is worth a look at the SIP Scootershop.
Time required for Do-It-Yourselfer between 3 and 5 hours, just for disassembling the scooter (depending on skill and knowledge).
Equally helpful is the following manual: Jetzt helfe ich mir selbst, Vespa Restaurierung (only available in german right now)
What a workshop hour costs depends on numerous factors, regionally as well as nationally. Here it is recommended to compare online some Vespa workshops and at best ask whether this service is offered at all.
First: workshop, garage – clear a suitable area, create space.
A strict structure of the procedure is required to ensure that the work is as trouble-free as possible. Simply screwing away at it is by no means purposeful!
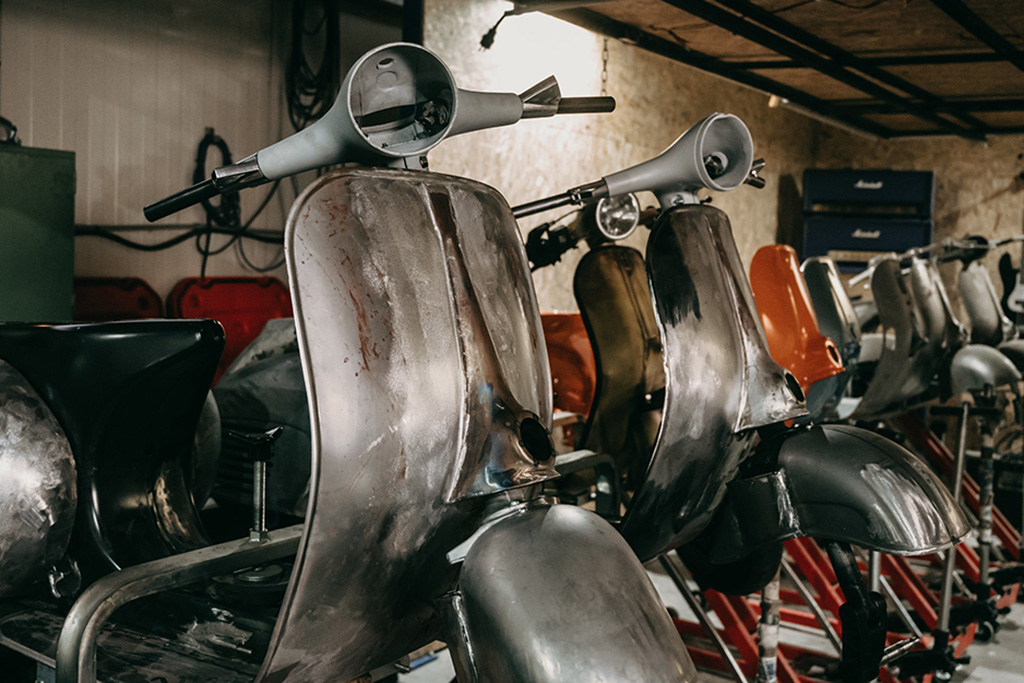
We select the disassembled parts into assemblies/containers.
Our recommendation:
- Electrical system
- Fork with associated parts
- Handlebar/parts
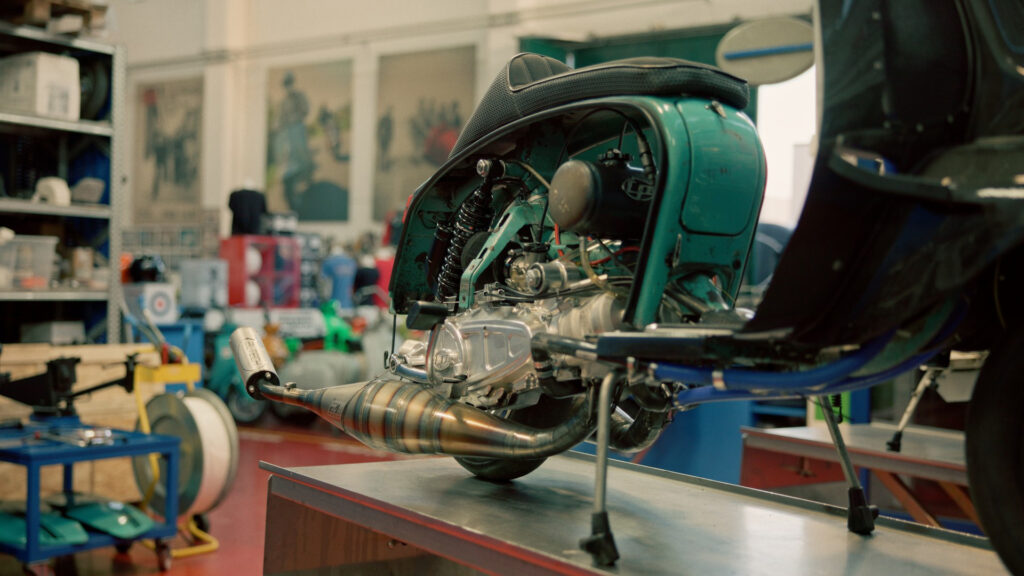
- Engine/engine parts
- Frame
- Wheels/Chassis
- Attachment parts
- Garbage can
This selection is not binding. There may also be fewer or more bins, depending on the space available. A free workbench is always useful.
All parts must be meticulously listed and inspected
Why is this so important?
If, in the course of the work, it is discovered that a screw is missing here and a new part needs to be ordered there, each separate order is not only counterproductive, but also wastes time and money.
Tip: If possible, order all the necessary components in bundles. This not only saves idle time, but also time, money and nerves.
The restoration will take weeks, possibly months. It’s easy to forget even the simplest assembly procedures. That is why we advise you to make notes/sketches. This is time better spent than guesswork during assembly.
We recommend to do-it-yourselfers to commission one or another activity to specialized companies suitable for this purpose. We are thinking of painters and tinsmiths, with all the extensive preparatory and finishing work. It is therefore not advisable to try to carry out these special activities yourself. The effort in relation to a permanently visible success is unequally high.
The biggest enemy of the scooter is called: RUST
Logically, this must be eliminated as best as possible. If this is not done rigorously, he will say after just a few months: Hello, here I am again!
Caution: After sandblasting, the treated parts usually look pretty good. But we Vespisti are not fooled, which is why we carefully search for rust in all folds and corners.
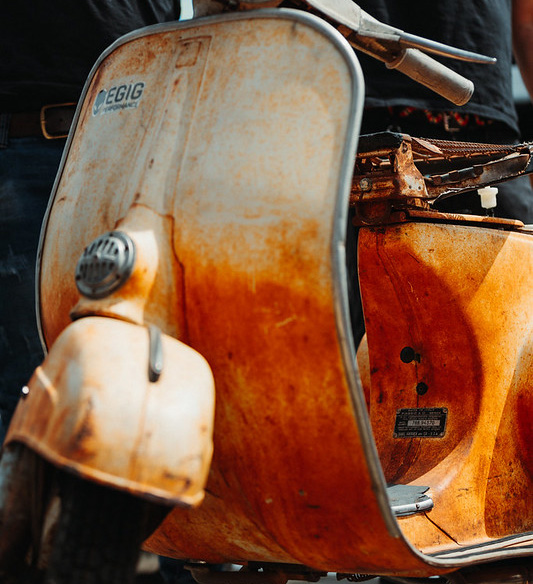
The largest areas of attack for rust are the underbody, leg shield, all hollow parts
The leg shield is also extremely thin, soft and flexible. Ideally, it should be completely replaced for cost reasons. Waves and dents can be everywhere. Little stones thrown up by the front wheel sometimes cause considerable damage. A paradise for rust.
We advise against trying to fill the finest cracks. The rust will certainly find its way to the material surface in the course of a riding season. The effort in relation to the result is too much. So: Take it to the workshop or replace it with a new leg shield.
We start step by step with disassembly
Have the necessary tools ready:
A 8 as well as a 10 nut,screwdriver cross and slot, drill for the rivets (kick strips), writing utensils.
- Remove headlight, tail light, turn signal, jaws, fender, seat, cascade, do not forget to label the cables.
- Remove engine because of stability of the jacked up scooter, seal fuel and oil lines provisionally (with suitable screws or similar)
- remove steering column, dismantle cables
- remove brake lever, clutch lever, cable guide, throttle tube and shift tube
- Remove tank so that the wiring harness can be pulled out from under the cascade. The handlebar consists of surprisingly many parts
- Loosen lock nut from steering head bearing
- Remove front wheel (left on for stabilization), remove shock and shock absorber
- pull out fork downwards
- remove the foot brake to remove the shift cables
- unscrew the middle part
- Drill out the rivets of the step bars
Having come this far means: as good as done. Depending on the structure of the new parts, the assembly is individually different.
Conclusion
If you want to or have to put your baby in someone else’s hands (you don’t have the technical understanding or the time), you can demand a result that meets your expectations from the specialist workshop, but you’ll have to pay a lot of money for it.
However, the fun of screwing and working falls by the wayside. And that is ultimately what makes the difference.
